Reviewing client updates and prioritising follow-up
Find your clients and spot who needs attention first
NoteA two-minute scan at the start of each day helps you prioritise who to focus on before sessions begin.
Log in and open the Individuals tab
After logging in, open the Individuals tab from the top navigation. This is your client list and your main daily starting point.
Filter to your own clients
Use the default Assigned to me filter (top-left) to narrow the list to your own caseload who have activated their Innowell account. If a client has been invited but has not activated their account yet, they may not appear in this list. Use the status dropdown to switch to Invited to check whether their invitation has been sent and is still waiting to be accepted.
Begin with clients who have risk flags or recent activity, then move through the rest of your caseload. This helps you focus your attention where it may be needed most.
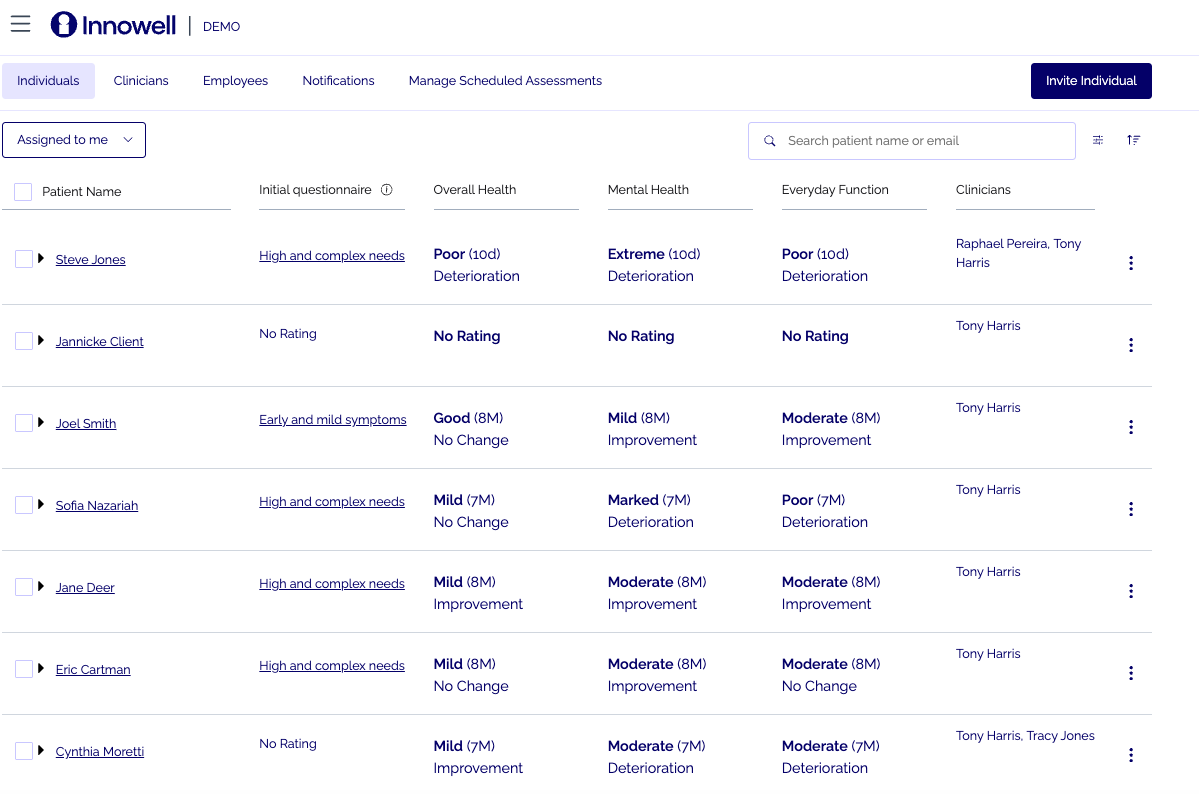
Your assigned client list gives you a clear starting point for checking recent updates, risk flags, and support requests.
Start with risk flags and recent activity
Begin by checking clients with risk flags, "I need help" activity, or recent assessment updates. These signals help you quickly identify who may need follow-up before you move through the rest of your list.
Recognising both icons instantly supports timely follow-up.
Spot the risk flags
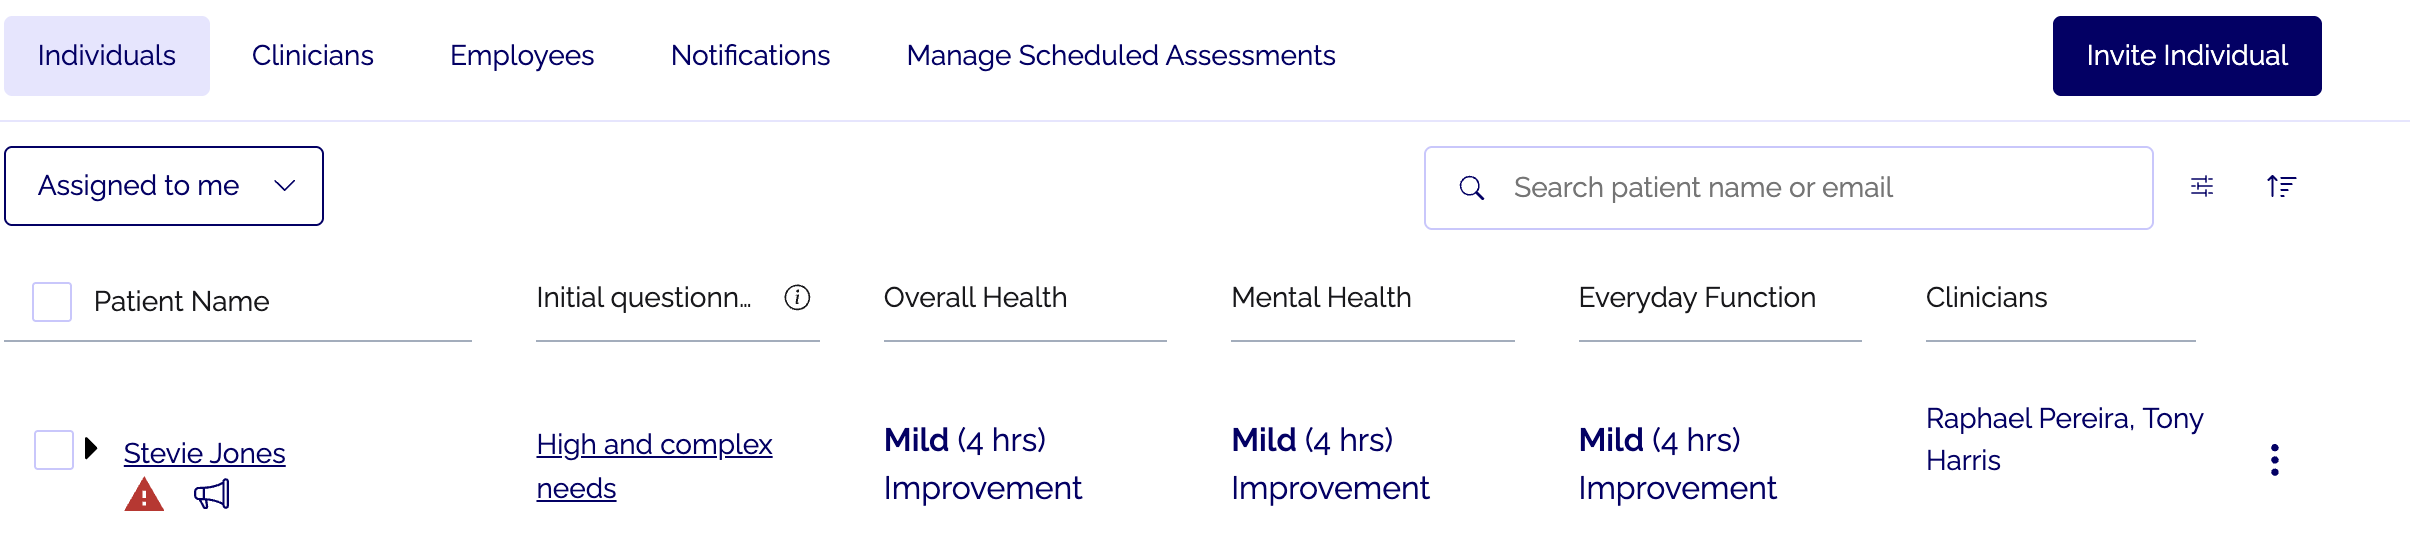
Two icons can appear beside a client's name, and they mean different things:
- A red triangle (⚠) is an active Suicidal Thoughts and Behaviour (STB) flag from the client's assessment responses.
- A megaphone (📣) means the client has selected the "I need help" button. The megaphone remains visible for 48 hours.
Review clients showing either icon first, and follow your service's risk response process.
See:Reviewing risk signals in Innowell
Good to knowThe flag is a prompt to look closer and follow your service's clinical protocol; it supports, rather than replaces, your clinical judgment.
Read the ratings, timeframes and trends
Each row shows the client's domains with a rating, the timeframe it relates to, and the direction of change.
- Rating: the on-screen label for that domain (for example Good, Mild, Poor). These are the platform's clinical labels; read them as a starting point for a conversation, not a verdict.
- Timeframe: how recent the result is.
- Trend: Improvement, No Change, or Deterioration.
Reading the row at a glance shows how a client has been tracking, which makes changes over time easier to notice before you even open the profile.
Reading the initial (stratified) score
The Initial questionnaire column shows a stratified score, giving you a first-glance summary of the client's level of need. Hover over the score to see the probability breakdown across each needs group.
Stratified scoring summarises a client's clinical needs across six areas: depression, anxiety, psychosis, mania, functioning, and suicidal thoughts and behaviours. It can help guide decisions about the level of care or follow-up a client may need.
Reading the row at a glance shows how a client has been tracking, which makes changes over time easier to notice before you even open the profile.
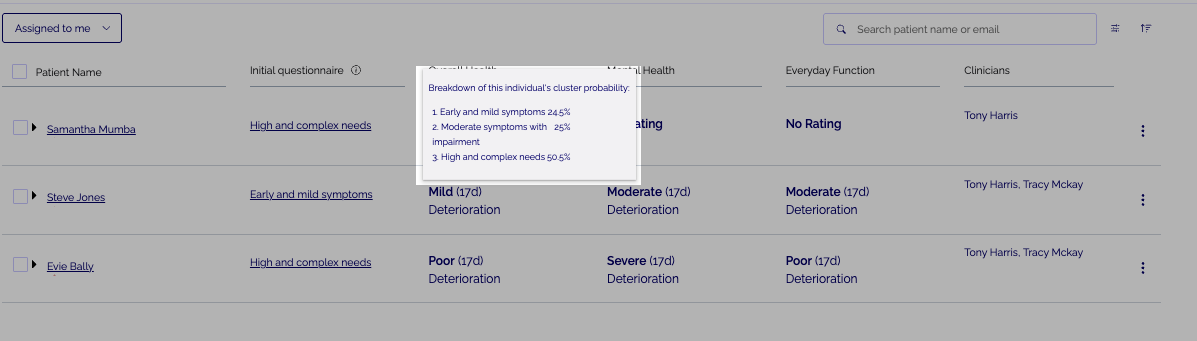
Hover over the Initial questionnaire score to view the probability breakdown across each needs group. This gives extra context behind the overall stratified score and can support review, planning, and care conversations.
Expanding a client's row
Click the downward arrow on a client's row to see a snapshot of their demographics and when they were last active. For the full profile, open the client's dashboard, then the three-dots menu, and choose View profile.
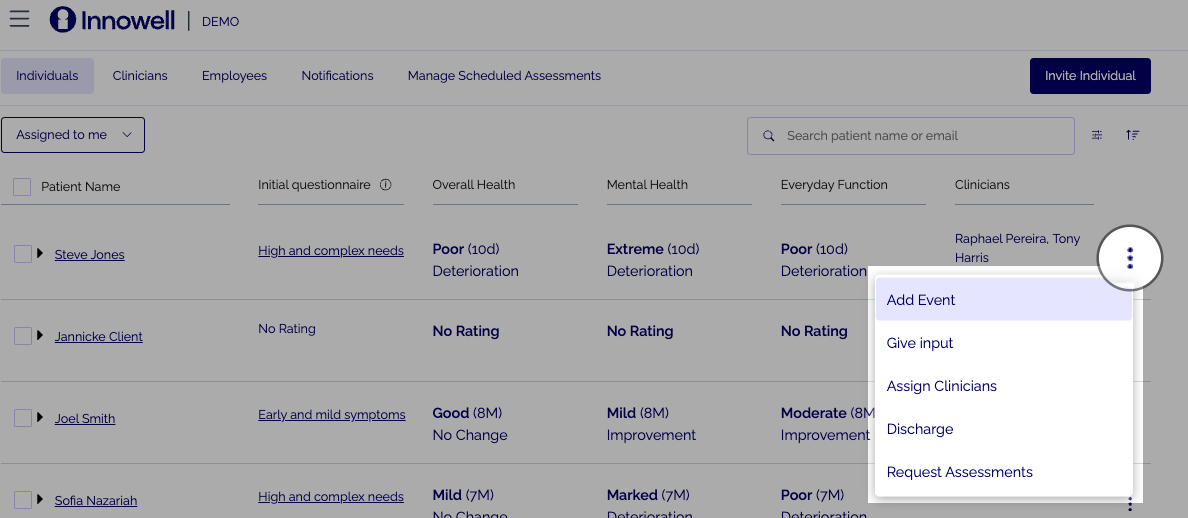
Actions from the individual list (the three-dots menu)
On an assigned client's row, the three-dots menu gives you quick actions without opening the full profile:
- Add Event: record context against a date.
- Give input: opens a summary assessment for you to complete with your client or on their behalf, when appropriate.
- Assign Clinicians: match a client to a clinician (lead clinicians and managers only).
- Discharge: removes the client from your Assigned to me list; they keep their own access to Innowell.
- Request Assessments: send a questionnaire now, or set one up on a schedule.
These quick actions let you act without leaving the list, which keeps the Health Snapshot current and follow-up moving with minimal clicks.
Requesting an assessment
Select Request Assessments to open a searchable list, including the Initial Questionnaire, Summary Questionnaire, and individual instruments. Tick the assessment you need, then choose:
- Send request(s): send it to the client now.
- Schedule Request: set it up for a future date or recurring cadence.
If you are preparing for a session and it has been more than a month since the client's last input, consider completing a Summary Questionnaire together.
The client's Health Snapshot needs at least two completed assessment timepoints before it can show change over time. Until then, it will show their current results as dials.
Scheduling a cadence keeps the client's picture current between sessions without you having to remember, keeping care data-informed.
Quick reference
| Element | Where | What it tells you |
|---|---|---|
| Assigned to me | Top-left filter | Limits the list to your caseload |
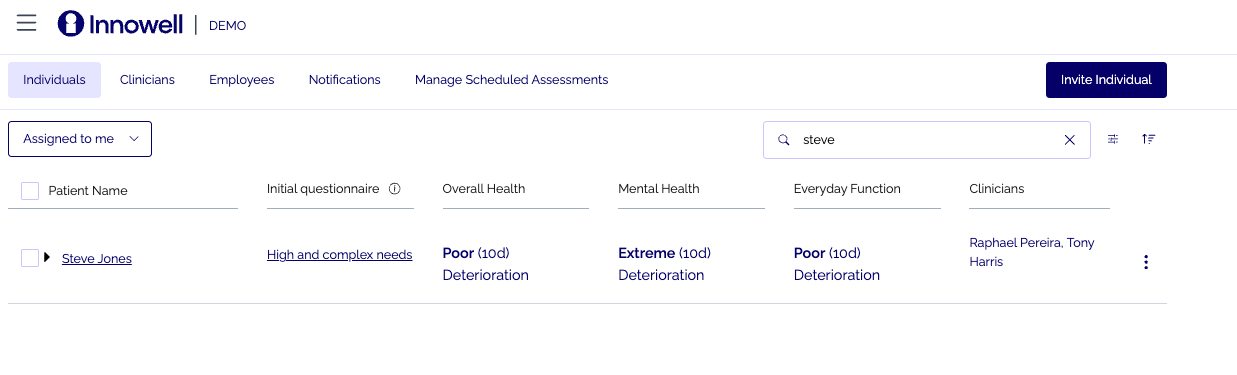
| Search bar | Top-right | Find a client by name or email |
| Status dropdown | Top of Individuals list | View clients by Active, Invited, Discharged, or Removed status |
| Trend label | Each domain cell | Improvement / No Change / Deterioration |
| ⚠ flag | Beside client name | Active STB flag, review first |
| 📣 megaphone | Beside client name | Client selected "I need help" (48 hours) |
| 💬 chat icon | Beside client name | Client has requested support to answer assessment |